Солнечный контроллер заряда PWM 60A 50A 40A 30A 20A 10A Регулятор солнечной энергии 12V 24V
3434.92

Сохраните в закладки:


*История изменения цены! Указанная стоимость возможно, уже изменилось. Проверить текущую цену - >
| Месяц | Минимальная цена | Макс. стоимость | Цена |
|---|---|---|---|
| Mar-19-2026 | 26051.81 руб. | 27354.90 руб. | 26702.5 руб. |
| Feb-19-2026 | 25833.42 руб. | 27125.83 руб. | 26479 руб. |
| Jan-19-2026 | 21673.94 руб. | 22757.5 руб. | 22215 руб. |
| Dec-19-2025 | 25395.4 руб. | 26665.70 руб. | 26030 руб. |
| Nov-19-2025 | 22111.83 руб. | 23217.15 руб. | 22664 руб. |
| Oct-19-2025 | 24957.39 руб. | 26205.28 руб. | 25581 руб. |
| Sep-19-2025 | 24738.55 руб. | 25975.18 руб. | 25356.5 руб. |
| Aug-19-2025 | 24519.41 руб. | 25745.18 руб. | 25132 руб. |
| Jul-19-2025 | 24300.97 руб. | 25515.46 руб. | 24907.5 руб. |
Новые товары
Характеристики
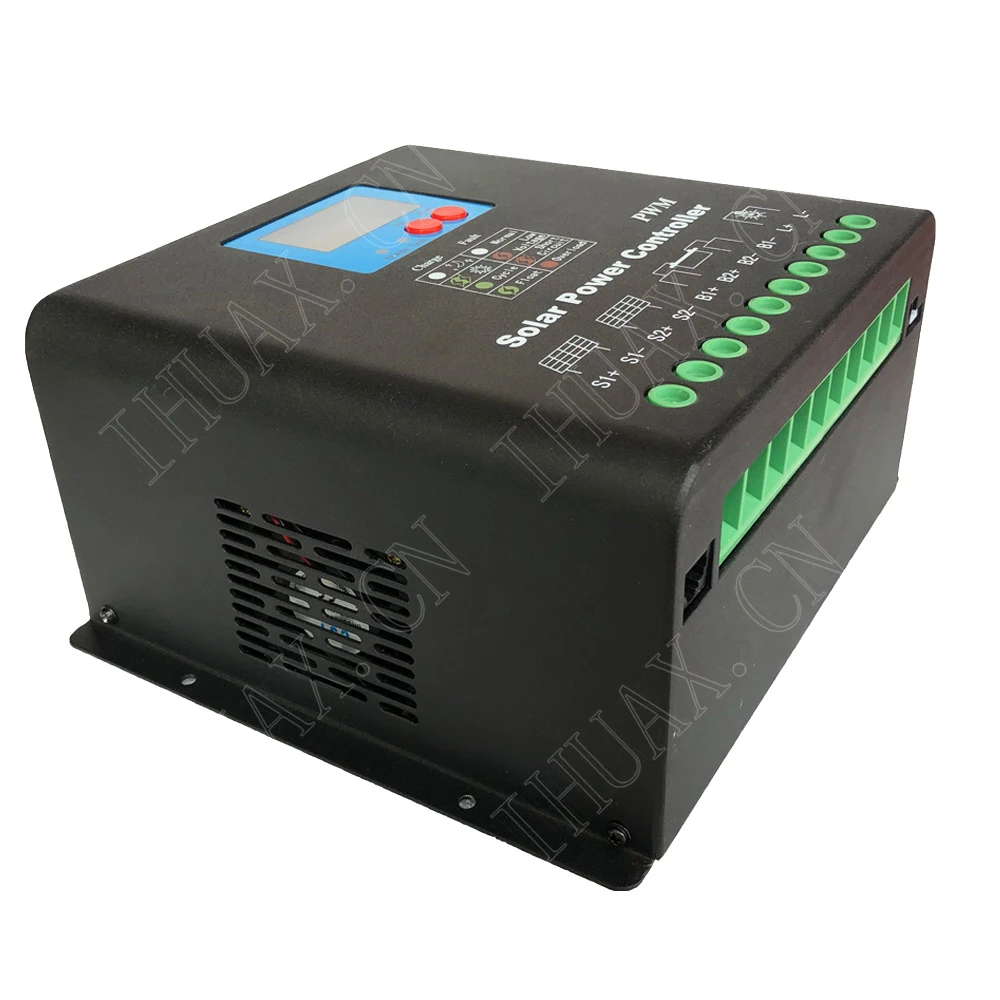
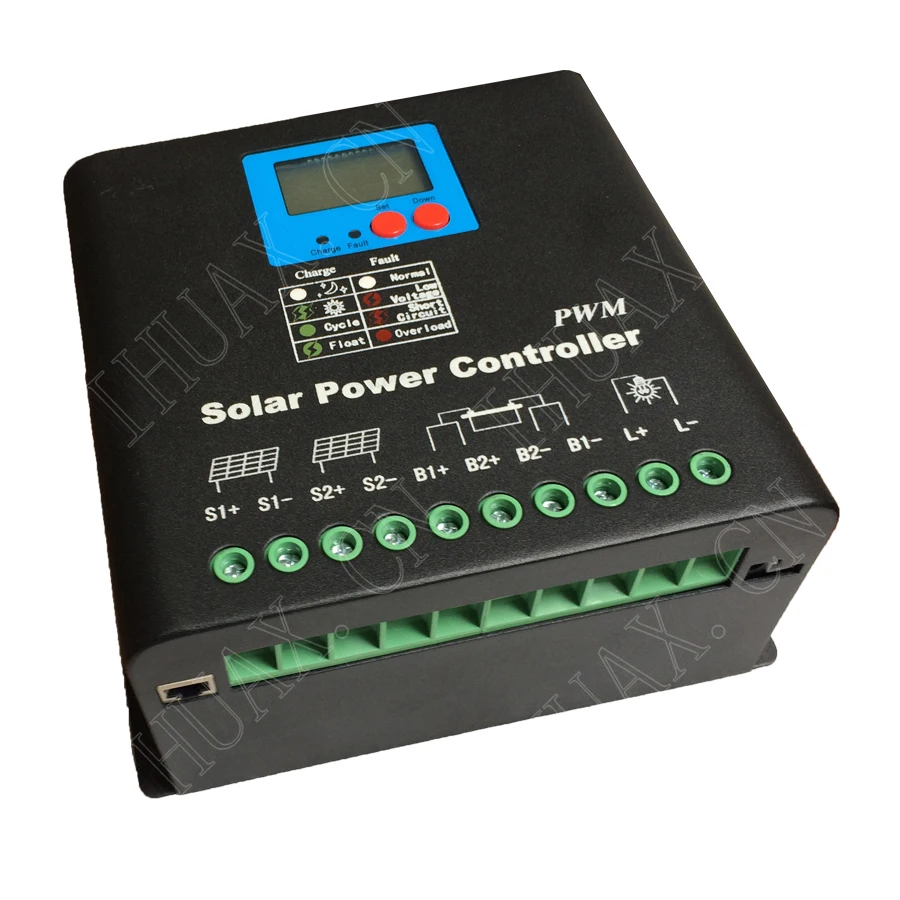
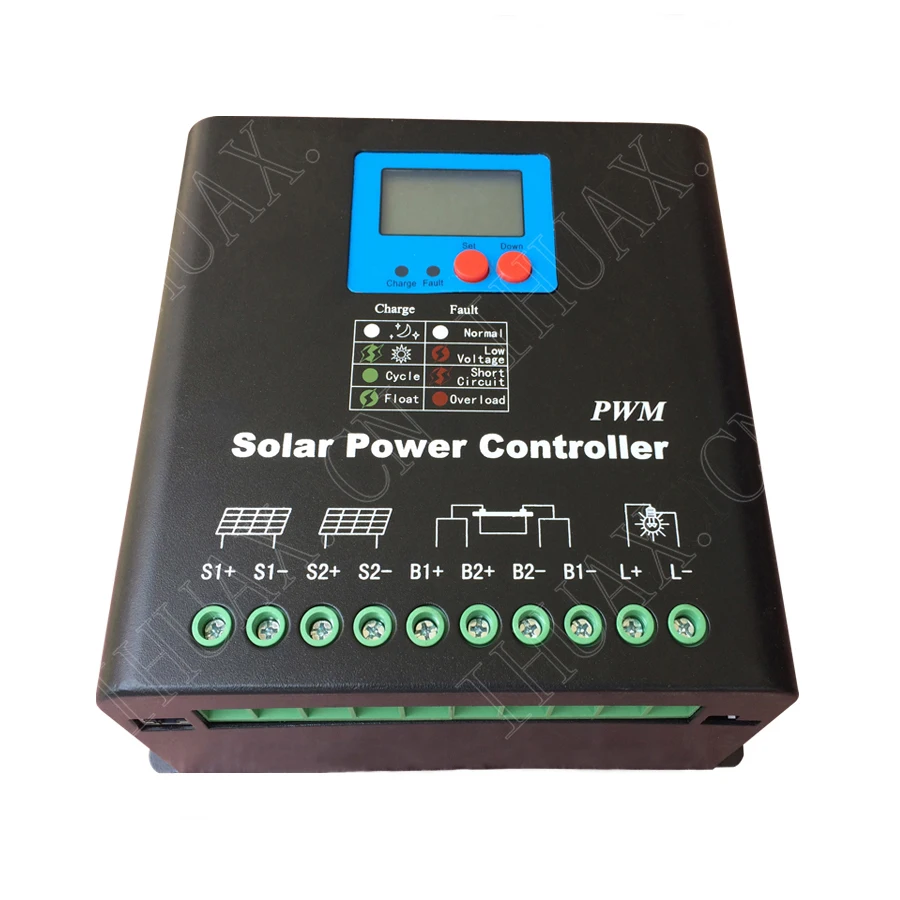
Описание товара
Product Overview
The controller is suitable for off-grid solar system(Independent System), can automatically control the process of charging and
discharge. The battery discharge process is optimized by the controller, which can extend the battery life and improve the system
performance. The comprehensive electronic protection can avoid controller damage in the installation errors and system failures.
Main Technical Highlights
1. Automatic identification of the system voltage 12V/24V;
2. Double MCU design with high speed and high performance;
3. Excellent heat dissipation and electromagnetic compatibility design;
4. The main circuit adopts the tandem PWM Charging, the charging efficiency is 3%-6% higher than non PWM, which can increase the power time and make t he system have a longer use life;
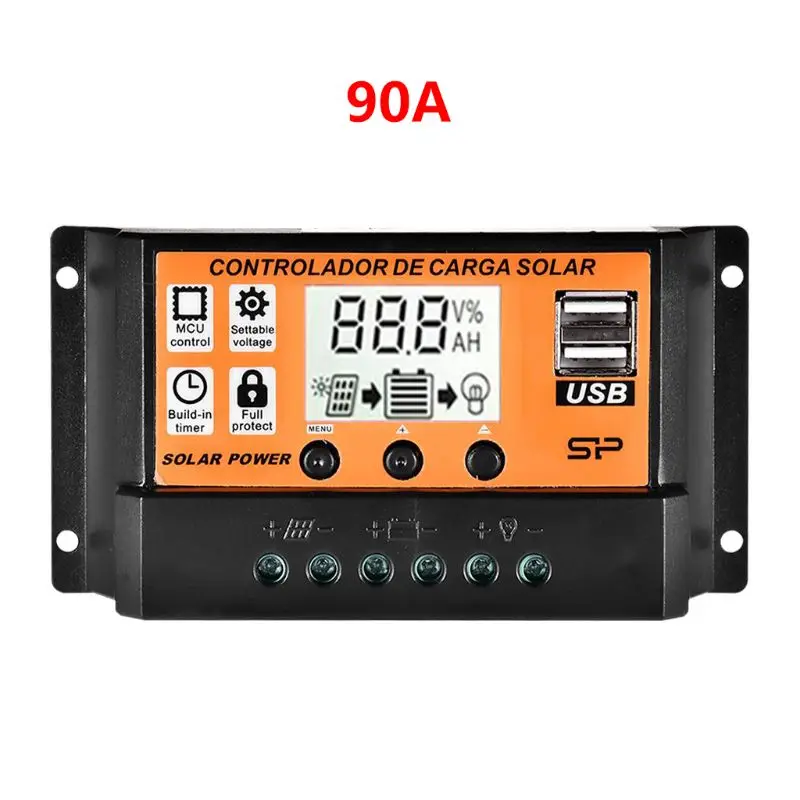
5. Adopting the character LCD liquid crystal display and double-button interface, complete menu display and operation;
6. Humanized browse interface, which makes the operation more convenient;
7. Use the power MOSFET as switch, without any mechanical switch;
8. Intelligent battery charge indicator conveniently allows users to check the working status of the battery;
9. Sealed lead acid, optional two kinds of battery charging procedure;
10. External temperature sensor, with high-precision temperature compensation;
11. Parameter setting off-electricity protection function, not need to repeat settings, very
conveniently use;
12. With intuitive LED displays, which can let users easily understand the running state of Solar, Battery and Loads;
13. With the protections of over-charge, over-discharge, over-load, electronic protection and battery reverse;
14. Against lighting protection.
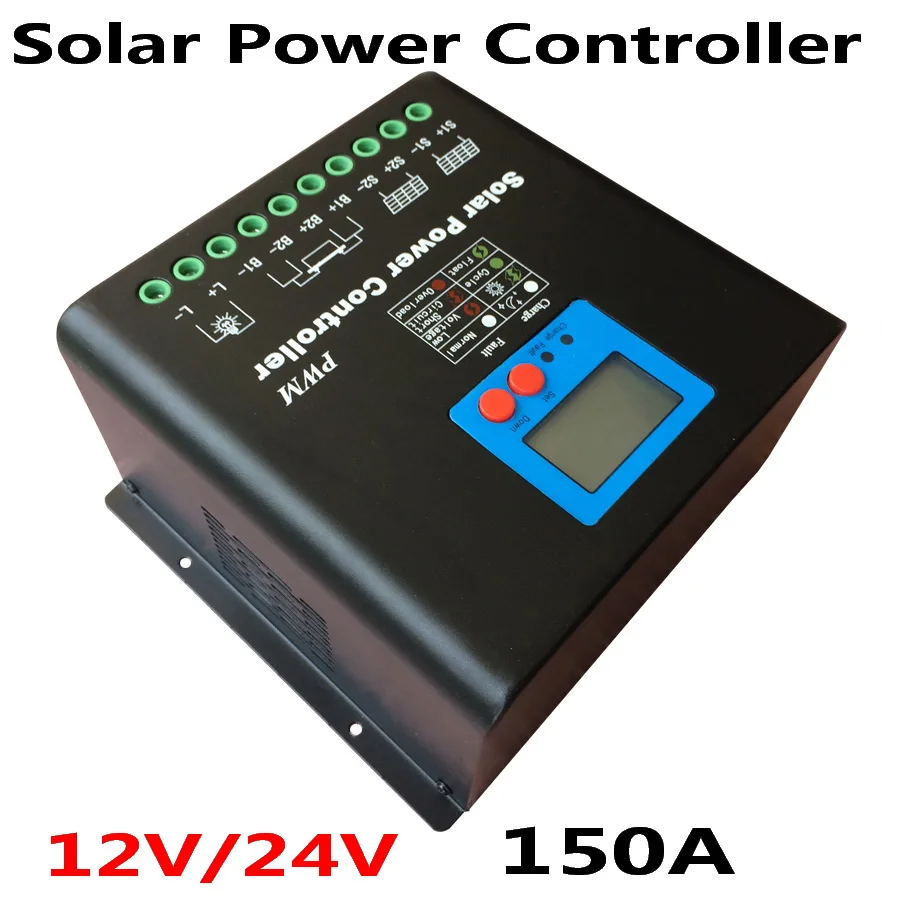
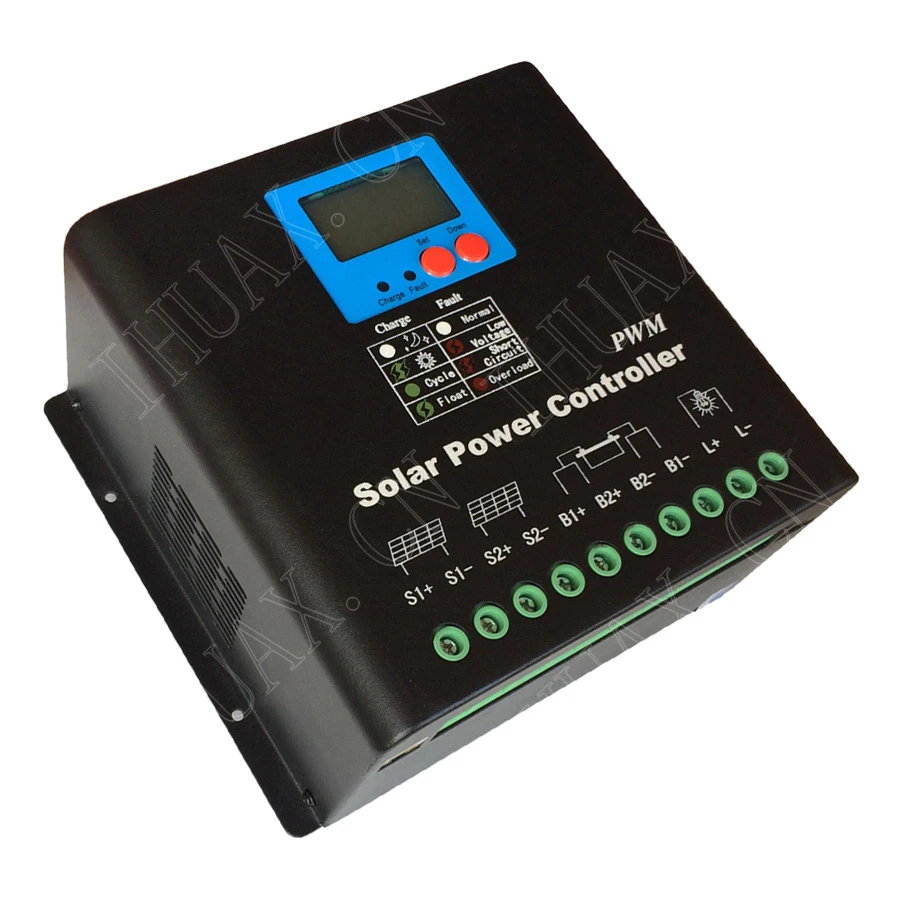
Technology Parameters Table
System voltage
12V 24V
System current
150A / 180A
No-load loss
<10mA <10mA
Solar energy input voltage
<=36V <=55VOver voltage protection
16.5V+-1% 33V+-1%
Over voltage recovery
15.0V+-1% 30.0V+-1%
Balance charge voltage
14.6V+-1% 29.2V+-1%
Increase charge voltage
14.4V+-1% 28.8V+-1%
Float charge voltage
13.8V+-1% 27.6V+-1%
Charging return voltage
13.3V+-1% 26.6V+-1%
Over discharge protection voltage
11.1V+-1% 22.2V+-1%
Over discharge return voltage
12.8V+-1% 25.6V+-1%
Night identification voltage
3.0V+-1% 6.0V+-1%
Daytime identification voltage
7.0V+-1% 14.0V+-1%
Temperature cmpensation
-4.0mv/degC/2V
Over-load, short circuit protection
1.25 times rating current 30S;1.5 times rating current 10S overload current protectionge3 times rating current short circuit protectionWork temperature
-25degCto+60degCProtection degree
IP30
Outline size
216mm*203mm*106.8mm
weight
3.60KG
System Connection Display
The controller panel figure

Wiring figure

LED Light Specification

LED
Model
Function Figure Charge
off
At night or battery is failed to connect (1)
Light normally
Normal charge (3)
Slow flash
Float charge (4)
Double flash
Daytime (no charge) (1) Protection
Red lamp in slow flash
Load line in under voltage or high voltage protection (7)
Red lamp in double flash
Load line short circuit protection (6)
Red lamp lights for long time
Load line over load protection (5)
off
normal work (8)
Dot light loop
The voltage of electric automatic identifying battery in the controller in medium Press the button to turn on the light. The light will turn off if no button has been pressed within 60s to save the electricity. Press the button for over 4s, the LCD will turn off. Press the button for 4s again, the LCD will turn on. Product photos
Installation Instructions
1. Strongly and securely install the controller;
2. The preparation of the conducting wire:calculate the length of the wire ,and then figure out the installation place,make sure the length of the wire is reasonable to decrease the loss of the electricity;
3. Connect the battery first,pay attention to the anode and the cathode to avoid the inverse connection.the indicator light of the battery will work if the connection is correct,otherwise,it will not ,but the component of the controller will not be damaged;
4. Connect the wire of the solar panel, pay attention to the anode and the cathode to avoid the inverse connection.if the connection is correct,the indicator light of ldquoCHARGErdquowill be on or flash 10 seconds later after laying outside under the sun,otherwise,please check the connection.make sure the solar energy panel is laid outdoors under the sunshine;
5. Connect the load at the end, pay attention to the anode and the cathode to avoid the inverse connection .if inverse connection ,the led lamp may be damaged;
6. The controllerrsquos maximum wire diameter range: 20-2AWG(0.5mm2-33.6mm2).